In the beginning I read a lot of articles, tried different techniques but the best thing I could have done was to make a light box. Most online instructions I found showed me how to make a light box for jewelry or craft items. Since I design and cut paper art I had to tweak my light box to fit my style and my art.
Step One: Gather your items
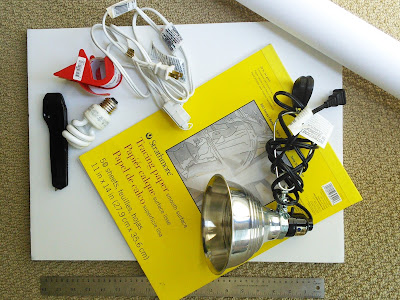
Items you will need:
- 2 – 20″ x 30″ Foam Boards
- 2 sheets of Tracing Paper
- Box Cutter
- Metal Ruler
- Packing Tape
- Roll of White Craft Paper
- 2-4 Lamps (clamp style or a bare bulb lamp)
- 1 CFL light bulb
- 1 Incandescent light bulb
- Extension Cord
- Double Side tape
- (optional) 3-4 Wooden Planks
Use your box cutter to cut the foam boards in half - 20" x 15". You will end up with four boards total.
Then create 2 10" x 13" windows, which will be 3 1/2" on the short side and 2 1/2" on the long side.
*(Optional) Create a 2" notch on the short sides to hold your lamps to allow the light to go deeper into the light box.
Use the double sided tape to affix the tracing paper to the 2 windows. Next use the packing tape to connect the three boards together. Leave a slight gap when taping so you can fold the foam boards over for storage.
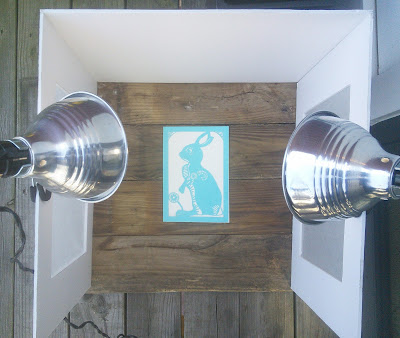
Place your light box if possible close to natural light, like a window and stand your light box on the wood planks. You can clip the lamps on the edges shining in or to the top of the box shining down. This also works outside in natural light, I use my balcony.
You can use the third white foam piece for the top and the fourth for the bottom if you choose. You can then drape the white kraft paper over the back to hide the seam.
Since my art is usually white or is placed on white paper this doesn't work for me. So I use the wood planks to add a natural feel to my paper cut art.
Since my art is usually white or is placed on white paper this doesn't work for me. So I use the wood planks to add a natural feel to my paper cut art.
Step Five: Have fun!
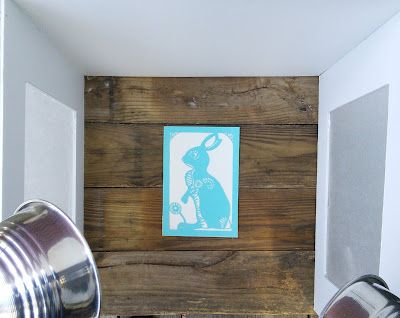
This is where you get to play with your lighting and placement. I like to look straight down into the light box to take my pictures.
You can take a look at my Etsy store to see how I used my light box and wooden planks to enhance my art.


No comments:
Post a Comment