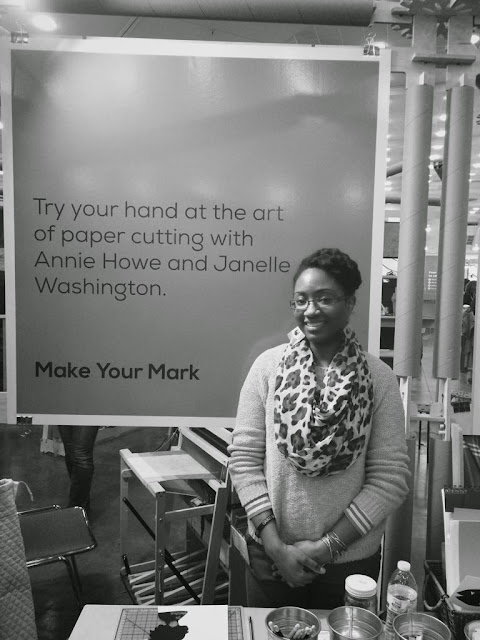
I participated in my first craft fair on December 28, 2014 in Richmond Va. My friend from college who owns a t-shirt printing company called Petal Foot invited me to attend with her. The cost was reasonably low, so I decided to give it a try.
The overall theme was for the holidays and it was based around Kwanzaa so I knew that this would be a good venue for me to introduce my cut paper art style and hopefully get a couple of sales.
I created a much better collection of paper cut art than I thought I would. Being a
paper cutting artist it was lots of hours of me sitting and cutting out the same
thing over and over, so that was no fun. I did pick my easiest paper cut to
duplicate and the more difficult art I got them printed professionally, which I
received three days before the craft fair. Talk about cutting it close! Learned
my first lesson.
So after six hours of sitting,
smiling, conversing and getting a headache from the loud music I was a bit
unhappy with my results. I did learn some valuable things for an artist so that
helps me looking forward to my next fair.
*Know your customer
I thought since this was a Kwanzaa
fair and my art is very afro-centric that my items would sell well. I didn’t
factor in the type of customer that would be there. My price point was a little out of most people's price range and even though I had a good variety of prices they were still high
for the customer. Selling original art
is no easy feat.
*Know your venue
The space at the Kwanzaa venue was
pretty small and extremely loud. It was hard to talk to
communicate with the customers that did come by so I wasn’t able to really
“sell” my artwork. The Kwanzaa program was long and that took most of the customer’s attention away from the vendors.
Also, there was a large chuck of time where the vendors were asked not to sell
items, so that sucked.
*Give something away for free
I had created a couple of small diamond
paper cuts that I was going back and forth on giving away free and then decided
not to. The price I listed wasn’t favorable with my customers even though I had
a lot of interest in them… especially the younger kids. So maybe candy next
time.
*Have a card reader and a receipt book
I love that Etsy provided their own
card reader and I ordered one early. The reader accepts
cash but I had several customers ask for a receipt in hand. Thank goodness for
my husband! He had bought a receipt book earlier for me.
*If you do custom orders have a way to
get your customer’s information while you are there.
I tried to prepare for custom orders
by showing what I offered but I wasn’t prepared for getting potential customer’s
information. I had several people tell me that they were interested in having
custom art and silly oh me just handed them an business card and told them to
contact me by way of my website…..
*Do giveaways
I didn’t even think to do this at all!
But my friend from PetalFoot did and I lost most of my email contacts to them..
*Ask for help
My husband attended the Kwanzaa fair
with me and without him I would have been burned-out. He was able to write receipts out, pack, load, unload the car and was great support. My parents
visited and that gave me a boost of morale! My mom even offered to buy us food
when we left, which leads to me to my next lesson.
*Bring snacks and your own spending
money!
I had a bottle of water and a small
bag of Doritos, which my husband ate! My water lasted the first hour and I
didn’t have enough snacks. So I was starving by the middle of the fair. I
didn’t have enough of my personal money to even buy the food that was being
sold there so I was starving after two hours.. The program was 8 hours long!
*Set up your table a week before and try to re-use household items
This was the best thing I could have
done to prepare for the fair. I spent hours looking through Pinterest for
examples and had a vision of what I wanted my table to look like. I visited my
parent’s home to rummage through their household items and found:
- a metal cash box with keys (sweet
find!)
- colorful bowl to hold my cards
- metal basket to hold my smaller items
- Tree limb to display my angel
ornaments/tags
- Target circular that displayed a
fold able 6’ in table with a handle on sale (great deal that went fast, should
have gotten two)
- String
I also visited my local Goodwill store
and found 2 interesting wire racks to display my prints.
*Remember to purchase or make the
small and forgotten items
I had ordered a couple of Kraft bags
but ordered them too late! I ended up running to Staples and buying a box of
generic “Thank You” plastic bags. Not the look I was going for. Remember to make or purchase:
- Price labels
- Your business sign
- A sign in book for emails
- Business cards ( a lot of them)
- Table cloth ( I just bought some
fabric that fit the dimension of my table and did a couple of hand stitches to
create a hem and to make the ends look nice. I also, used sewers tape to iron a
hem on for my table runner.)
- A small bag for pins, tape, markers,
scissors etc.
- Heavy duty bags to carry my items
into the building
- Sturdy box to hold extra merchandise
- A safe place to hide my personal
items like wallet, car keys etc.
So even though I didn’t break even, I
learned a couple of valuable lessons and I hope my mistakes and lessons will
help you to have a successful or at least an interesting first craft fair! I look forward to my next craft fair and
to put my changes in place.
Please share in the comment section if
you have any other lessons or tips! I would love to hear from you!
*Bonus
Here is a list of great online
resources that helped me prepare.


.JPG)